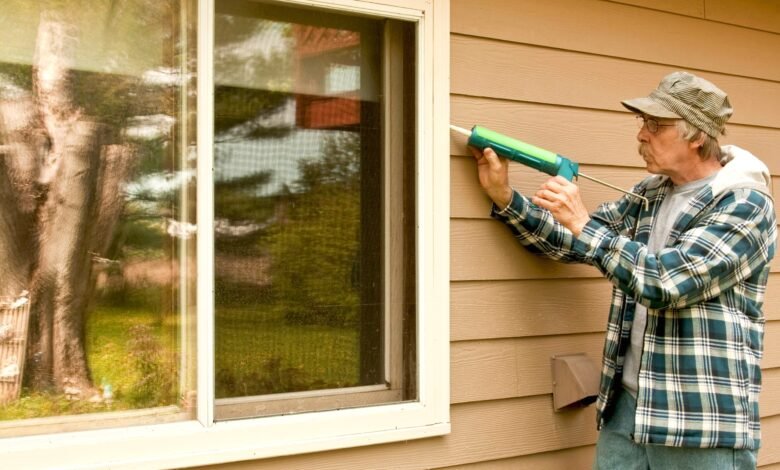
How to Seal Windows and Doors to Save on Energy
This comprehensive guide will walk you through everything you need to know about how to seal windows and doors to save on energy.

Saving on energy is not only beneficial for your wallet but also for the environment. One of the most effective ways to enhance energy efficiency in your home is to seal windows and doors properly. This comprehensive guide will walk you through everything you need to know about how to seal windows and doors to save on energy, reduce utility bills, and maintain a comfortable indoor climate year-round.
Why Sealing Windows and Doors Matters
Air leaks around windows and doors are a major source of energy loss in homes. These leaks allow warm air to escape during the winter and let in hot air during the summer, forcing your heating and cooling systems to work overtime. By learning how to seal windows and doors effectively, homeowners can significantly reduce these inefficiencies.
Key Benefits of Sealing Windows and Doors:
- Lower energy bills
- Enhanced indoor comfort
- Reduced noise pollution
- Increased home resale value
- Improved HVAC performance
- Less strain on the environment
Signs You Need to Seal Windows and Doors
Before you begin any sealing project, it’s important to identify whether your windows and doors actually need attention. Here are some common signs:
- Drafts – Feeling air movement around the edges of windows or doors.
- Rising Energy Bills – Unexplained increases in heating or cooling costs.
- Visible Gaps – Noticing light or gaps around frames.
- Condensation or Moisture – Water build-up between window panes.
- Noise Infiltration – More outdoor noise entering your home.
Tools and Materials You’ll Need
Before you start sealing windows and doors, gather the necessary tools and materials. Here’s a checklist:
- Weatherstripping
- Caulk (silicone or latex)
- Caulking gun
- Utility knife
- Foam sealant
- Screwdriver
- Measuring tape
- Cleaning supplies
- Putty knife or scraper
Optional but helpful items:
- Infrared thermometer
- Draft detector
Step-by-Step Guide to Seal Windows and Doors
Step 1: Inspect and Identify Leaks
Use your hand or a draft detector to identify leaks. Pay attention to:
- Window sashes
- Door frames
- Thresholds
- Sill plates
Pro tip: Conduct this inspection on a windy day for more accurate detection.
Step 2: Clean the Surface
Proper adhesion of sealing materials requires clean surfaces. Use a damp cloth or mild detergent to clean the areas you intend to seal. Remove old caulk or weatherstripping using a putty knife.
Step 3: Apply Weatherstripping
Weatherstripping comes in various materials like foam, rubber, or vinyl. Choose one that fits your climate and door/window type.
For Doors:
- Apply weatherstripping to the door frame.
- Install a door sweep on the bottom of exterior doors.
For Windows:
- Use V-strip or tension-seal weatherstripping for window sashes.
- Foam tape is ideal for window stops and jambs.
Step 4: Use Caulk to Seal Gaps
Caulk is ideal for sealing stationary gaps around door and window frames.
How to Apply Caulk:
- Cut the tip of the caulk tube at a 45-degree angle.
- Load it into the caulking gun.
- Apply a consistent bead along the seams.
- Smooth the bead with a wet finger or caulking tool.
Use silicone-based caulk for exterior applications and latex-based for interior use.
Step 5: Apply Foam Sealant for Larger Gaps
Expanding foam sealant is best for gaps over 1/4 inch.
- Shake the can before use.
- Apply foam sparingly; it expands as it cures.
- Trim excess foam after drying.
Step 6: Install Door Sweeps and Thresholds
To seal under-door drafts, install:
- Door sweeps: Brush or rubber strips attached to the bottom of the door.
- Adjustable thresholds: Can be raised to meet the bottom of the door for a tight seal.
Seasonal Maintenance Tips
Sealing windows and doors isn’t a one-time job. Regular maintenance helps retain energy efficiency year-round.
Spring/Summer:
- Check for dried or cracked caulk.
- Replace worn weatherstripping.
Fall/Winter:
- Inspect for drafts before the cold season.
- Reinforce door sweeps and thresholds.
Energy-Saving Upgrades to Consider
Beyond sealing, you can consider these upgrades for maximum energy savings:
- Double or Triple-Pane Windows: Improve insulation.
- Low-E Glass Coatings: Reflect infrared and UV light.
- Insulated Doors: Offer better thermal resistance.
- Storm Doors and Windows: Add an extra layer of protection.
Common Mistakes to Avoid
- Using the Wrong Caulk: Always choose caulk suited for your project (interior vs. exterior).
- Skipping Surface Preparation: Dirty surfaces prevent proper adhesion.
- Overapplying Foam: Foam expands significantly and can warp frames.
- Neglecting Regular Maintenance: Seals degrade over time and need inspection.
Cost vs. Savings
The initial cost to seal windows and doors is relatively low, especially compared to the potential savings.
Estimated Costs:
- Caulk: $5–$10 per tube
- Weatherstripping: $5–$30
- Foam sealant: $5–$15 per can
Potential Annual Savings:
- Up to 20% on heating and cooling bills, according to the U.S. Department of Energy
Environmental Impact
By sealing windows and doors, you reduce the carbon footprint of your home. Less energy use means fewer greenhouse gas emissions. It’s a small step with significant environmental returns.
Final Thoughts
Learning how to seal windows and doors is a smart investment for any homeowner. It’s a relatively simple and affordable project that offers immediate benefits in energy savings, comfort, and sustainability. By addressing leaks and drafts today, you can enjoy a more energy-efficient and environmentally friendly home for years to come.
If you’re looking to seal windows and doors to save on energy, start with an inspection, gather the right materials, and follow the step-by-step guide above. You’ll be surprised at how big a difference this small home improvement can make.


