DIY Roof Inspection Checklist Every Homeowner Should Use
This comprehensive checklist will guide you through the process of DIY roof inspectionnd is a checklist every homeowner should use.
Your roof is one of the most critical components of your home, protecting you and your belongings from the elements. However, it’s often overlooked until a serious problem arises. Conducting a regular DIY roof inspection is a cost-effective way to catch issues early, prolong the lifespan of your roof, and avoid expensive repairs. This comprehensive checklist will guide you through the process of inspecting your roof safely and thoroughly.
Why a DIY Roof Inspection Matters
Roof repairs and replacements can cost thousands of dollars. By conducting routine inspections yourself, you can spot early warning signs of damage or wear and take preventive measures. Moreover, many insurance policies require regular maintenance to remain valid. Performing a DIY roof inspection gives you peace of mind and saves you money in the long run.
How Often Should You Inspect Your Roof?
Experts recommend inspecting your roof at least twice a year—once in the spring and once in the fall. Additionally, it’s wise to perform a check after major storms or extreme weather events. These inspections can help identify wind damage, water infiltration, or fallen debris that may have compromised your roof’s integrity.
Safety First: Precautions Before Starting Your DIY Roof Inspection
Before climbing up on your roof, safety should be your number one priority. Here are a few precautions to take:
- Use a sturdy ladder with a stabilizer.
- Wear non-slip shoes.
- Avoid inspecting during rainy, icy, or windy conditions.
- Consider using binoculars or a drone to inspect areas that are difficult or dangerous to reach.
If at any point you feel unsure, it’s best to contact a licensed roofing contractor.
DIY Roof Inspection Checklist
Use this checklist to methodically inspect your roof, starting from the ground and working your way up.
1. Inspect Roof from the Ground
Start with a visual inspection from your yard. Walk around your home and look for:
- Missing, cracked, or curling shingles
- Sagging roof lines
- Piles of granules (from asphalt shingles) near downspouts
- Moss or algae growth
Using binoculars can help you see more detail without climbing a ladder.
2. Examine Gutters and Downspouts
Your gutter system plays a vital role in roof health by directing water away from your home. Check for:


- Blockages caused by leaves, twigs, or debris
- Rust or corrosion
- Loose or detached sections
- Signs of water overflow or leakage
Clean the gutters and ensure water flows freely through the downspouts.
3. Climb Up for a Closer Look (If Safe)
If you’re comfortable and it’s safe, climb up for a closer inspection. Focus on the following:
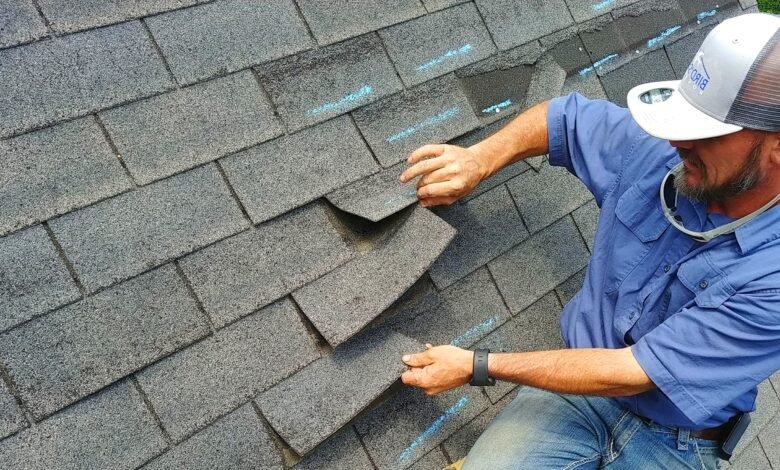
a. Shingles and Tiles
Look for:
- Cracks, breaks, or curling
- Missing shingles or tiles
- Discoloration or patches
- Loose or exposed nails
b. Flashing and Sealants
Flashing is the metal used around chimneys, vents, and skylights to prevent water intrusion. Inspect for:
- Rust or corrosion
- Gaps or cracks
- Loose or missing pieces
c. Roof Valleys
These are areas where two roof slopes meet. They are particularly vulnerable to leaks.
- Ensure no debris is collecting in the valleys
- Look for signs of wear, cracking, or deterioration
d. Chimney and Skylights
- Check that chimney caps are intact
- Inspect the mortar and bricks for cracks
- Ensure skylight seals are unbroken and watertight
e. Roof Vents
- Confirm all vents are unobstructed
- Check for cracks, rust, or missing components
Interior Roof Inspection
Don’t forget to inspect the interior areas of your home that could reveal roof problems:
- Attic: Look for water stains, mold, or mildew
- Ceilings: Check for discoloration or peeling paint
- Walls: Look for bulging or soggy drywall
These signs often indicate leaks or poor ventilation.
Signs You Need Professional Help
While a DIY roof inspection can help you spot minor issues, some problems require a professional touch. Call a licensed roofer if you notice:
- Large areas of missing shingles
- Severe water damage or sagging
- Persistent leaks
- Structural issues or mold growth
Attempting complex repairs yourself can lead to more damage and higher costs.
Tools You’ll Need for a DIY Roof Inspection
Having the right tools on hand makes the process easier and safer:
- Sturdy extension ladder
- Flashlight (for attic inspection)
- Binoculars or drone
- Notebook or inspection checklist
- Camera or smartphone for documentation
- Work gloves
Tips to Maintain Roof Health Year-Round
Preventive maintenance is key to extending the life of your roof. Here are some tips:
- Clean your gutters regularly
- Trim overhanging tree branches
- Remove moss and algae promptly
- Inspect after storms or high winds
- Address small repairs immediately
Common Roofing Problems to Watch For
Here are some typical issues you might encounter during your DIY roof inspection:
- Granule Loss: Common in aging asphalt shingles, this reduces UV protection.
- Blistering: Caused by trapped moisture or poor ventilation.
- Punctures and Holes: Often from falling branches or foot traffic.
- Sagging: Indicates structural problems or water damage.
- Ice Dams: Can lead to water backing up under shingles in cold climates.
The Importance of Documentation
Always document your inspection findings with photos and notes. This information is useful for:
- Home insurance claims
- Future comparisons
- Contractor consultations
Having a record of your DIY roof inspections demonstrates responsible homeownership and can support your case if issues arise.
Conclusion: Stay Proactive, Stay Protected
Your roof is your home’s first line of defense against the elements. By using this DIY roof inspection checklist, homeowners can spot potential problems early, save on costly repairs, and ensure the long-term health of their roofing system. Regular, proactive inspections empower you to take control of your home maintenance and provide peace of mind through every season.
Whether you’re preparing for winter, assessing storm damage, or just doing your spring maintenance, incorporating a DIY roof inspection into your routine is a smart and practical approach for every homeowner.